
MyPortal Registration User Guide
This guide includes detailed steps and illustrations to help you enroll in classes by using the MyPortal online registration system. Below, you will find information on several related topics.
- Logging In to MyPortal
- Opening the Registration Tile
- Checking Your Date to Register
- Searching for Classes
- Using the Open Classes Finder
- Adding or Dropping Classes
- Using the Waitlist
- Adding With an Add Code
- Changing Grade Options (Pass/No Pass)
- Auditing a Class
Need Help?
If you have questions or run into trouble, contact the Admissions and Records Office at webregda@deanza.edu or use the online A&R Help Form.
Logging In to MyPortal
Click on the MyPortal icon at the top of any De Anza College webpage, or open a new browser tab and type in myportal.fhda.edu (https://myportal.fhda.edu/).
Use Your CWID
Log in with your eight-digit student identification number, also known as your Campuswide ID (CWID).
- New students: You should have received your CWID by email soon after your application for admission was accepted.
- Continuing students: Use the same CWID you used before.
- Trouble signing in? Contact the Admissions and Records Office at webregda@deanza.edu or use the online A&R Help Form. (F-1 visa students should contact the International Student Programs office.)
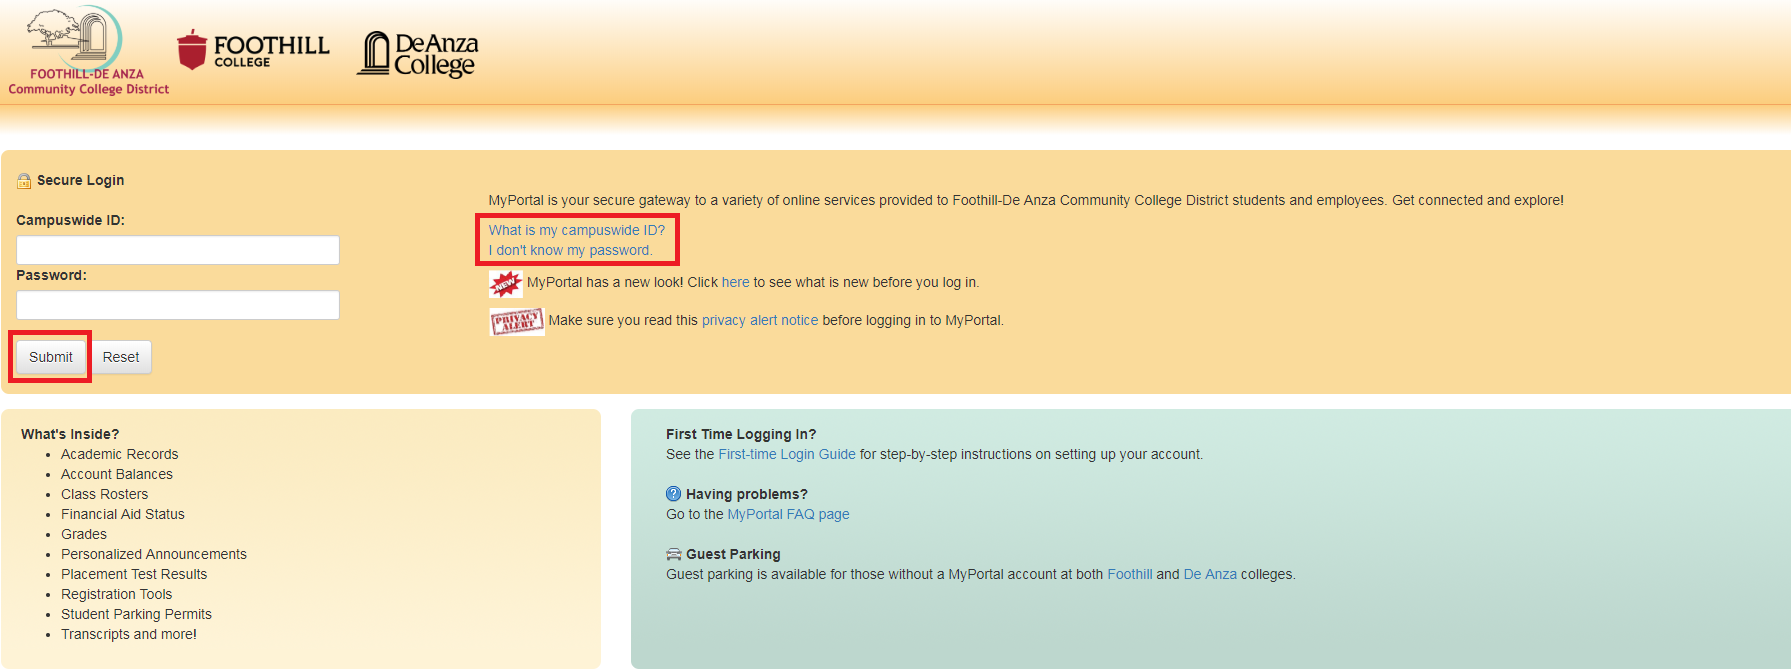
Enter Your Password
The first time you log into MyPortal, your password will be your eight-digit date of birth, in this order: MMDDYYYY. For example, if you were born Sept. 4, 1991, it would be 09041991.
You will then be prompted to set your permanent password. Please choose at least eight characters – including a mix of numbers, letters and special characters – for your new password.
Important Information
- You must have a unique email address to enroll at De Anza. That means you can't share an email address with another student. The registration system will not recognize a second student using the same address.
- If you have unpaid fees at either De Anza or Foothill College, you could be subject to a "registration hold" that will prevent you from adding or dropping classes at both colleges. This may also block the release of your academic records.
Opening the Student Registration Tile
 Once you've logged in to MyPortal, look for the Student Registration card and click to open the Student Registration page.
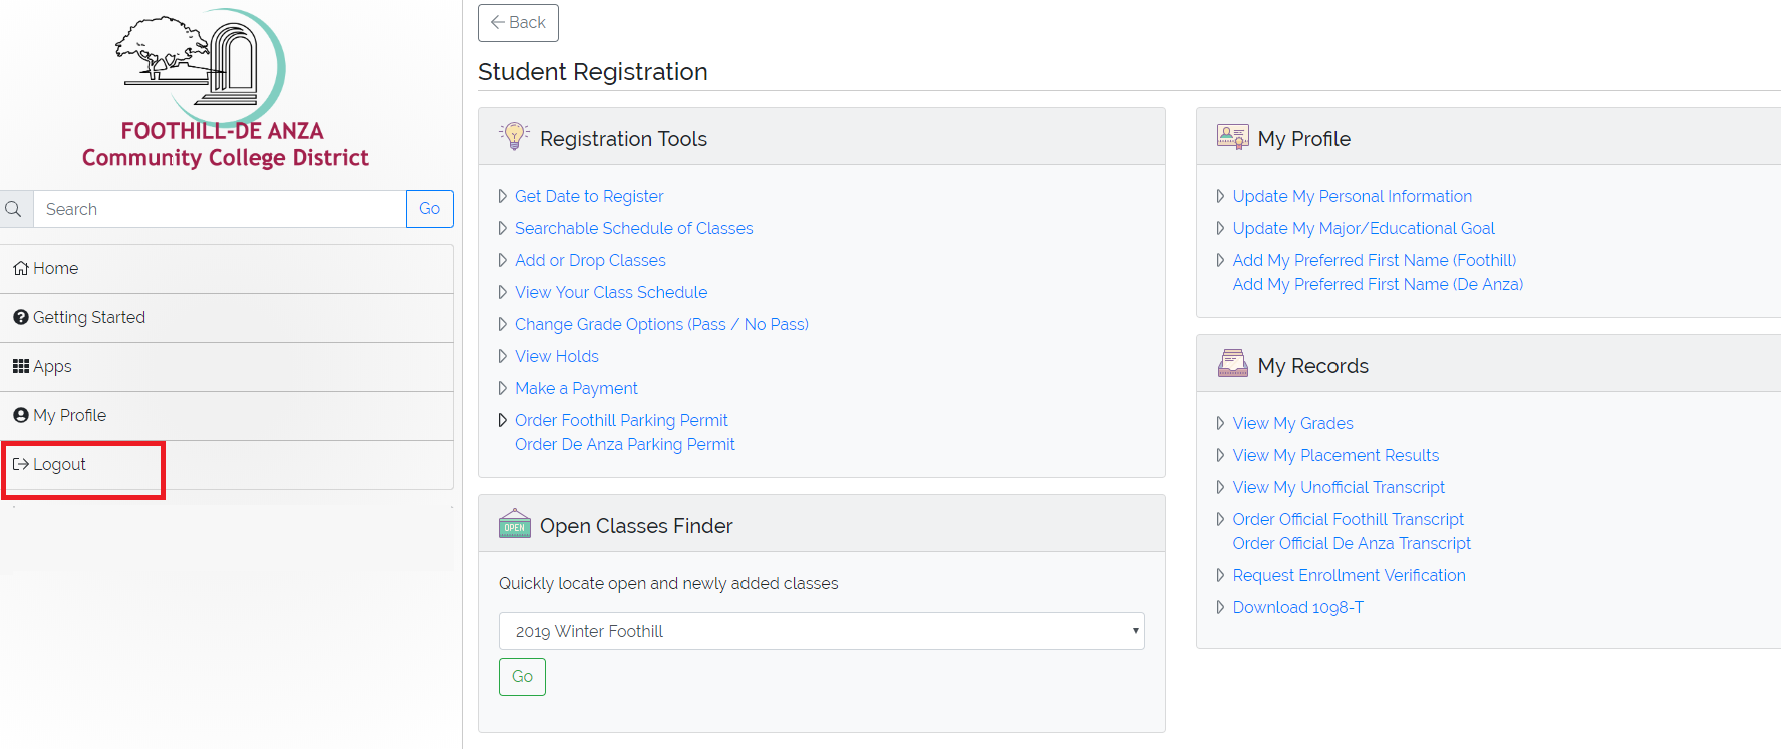
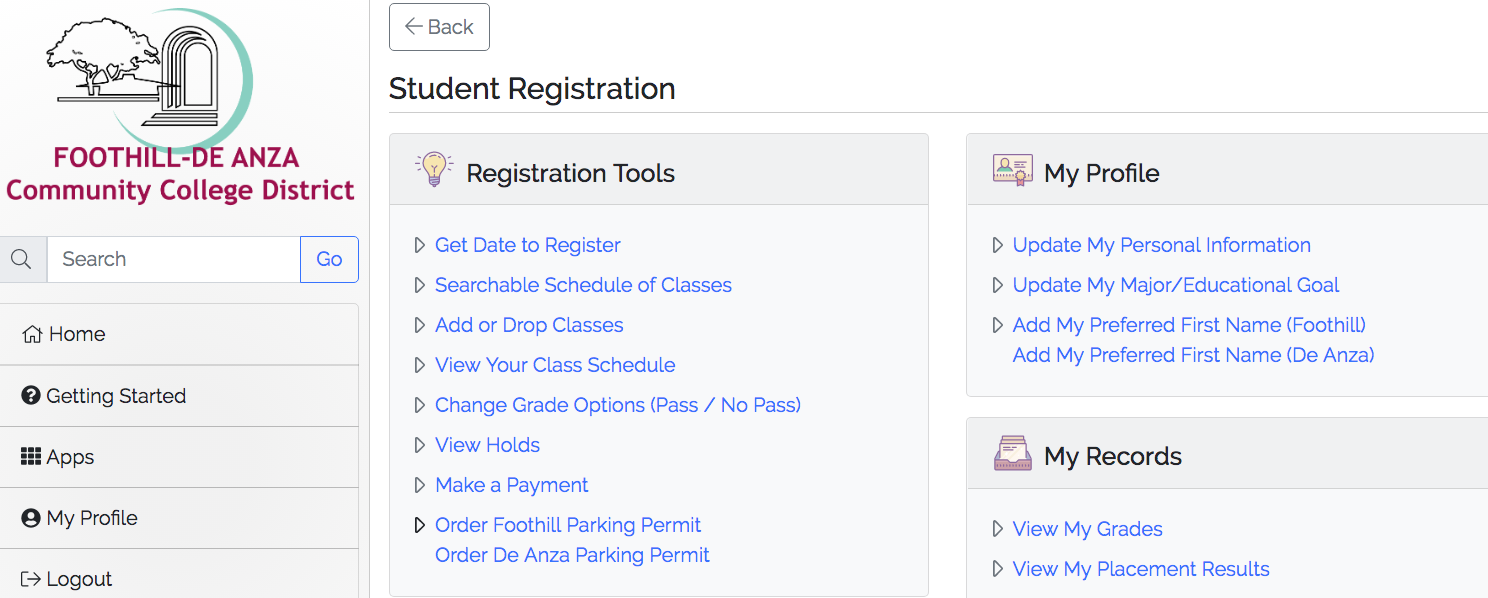
Registration Tools
When you open the Student Registration page, you'll see a list of links under the heading Registration Tools. By clicking on these links, you can search for classes, add or drop classes, add waitlisted classes, select grading options (such as Pass/No Pass), pay fees and see any holds placed on your account.
You can use the same page to perform similar functions for Foothill College.
You'll see other tiles on the main Apps page for things like Financial Aid, Bill Payment and other functions.
Logging Out
When you finish using MyPortal, be sure to click on the Logout button. This is especially important if you are using a computer that other people may also be using.
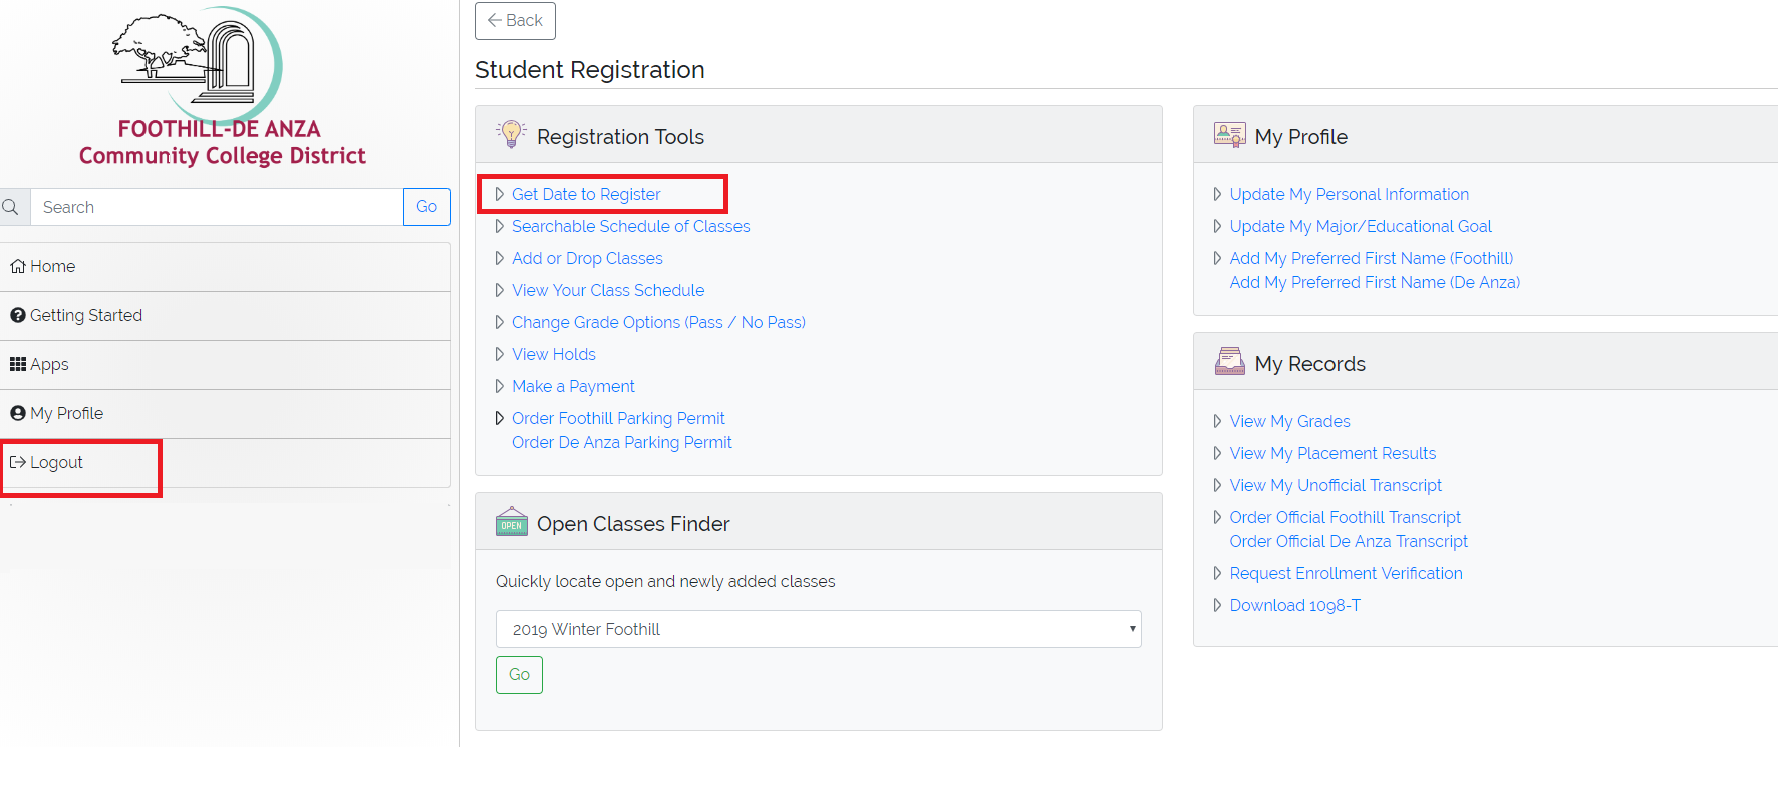
Checking Your Date to Register
You can find out when you can begin registering for classes by clicking on the Get Date to Register link under Registration Tools. This will open a new tab that shows the earliest time and date that you can register for the next term at De Anza.
- You must apply and be admitted to De Anza College before you can register for classes.
- If you want to take classes at Foothill College, you must apply separately there.
After you click on Get Date to Register, you will see the Registration Status page.
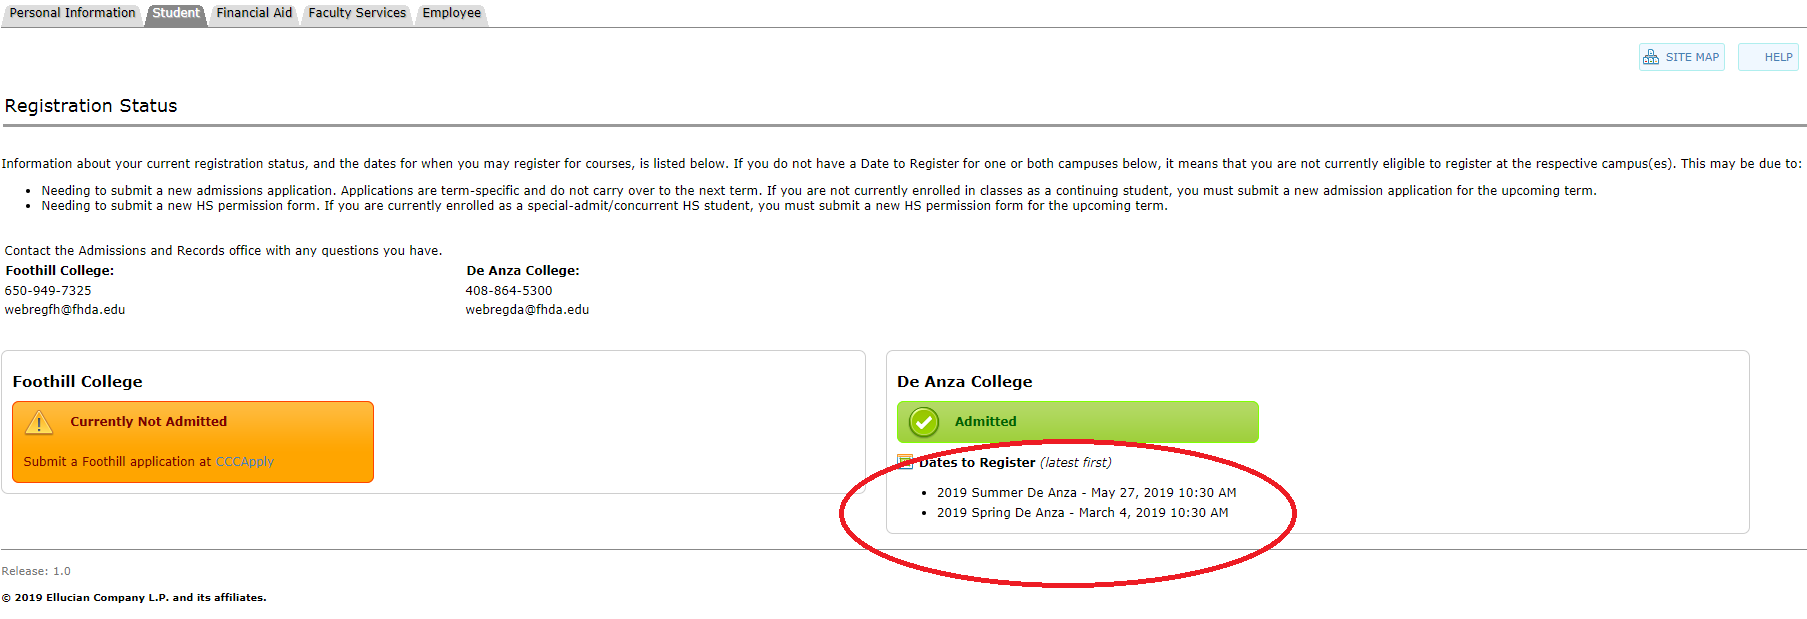
To return to the main Student Registration page, click on the MyPortal tab of your web browser.
Searching for Classes
While you are on the main Student Registration page in MyPortal, look under Registration Tools and click on the Searchable Schedule of Classes link.
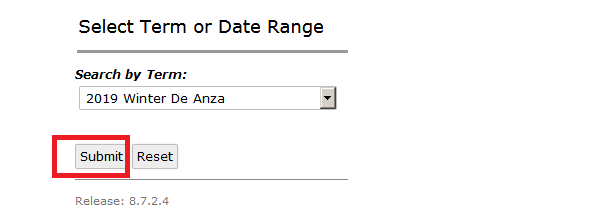
Next, select the college and term that you want to search.
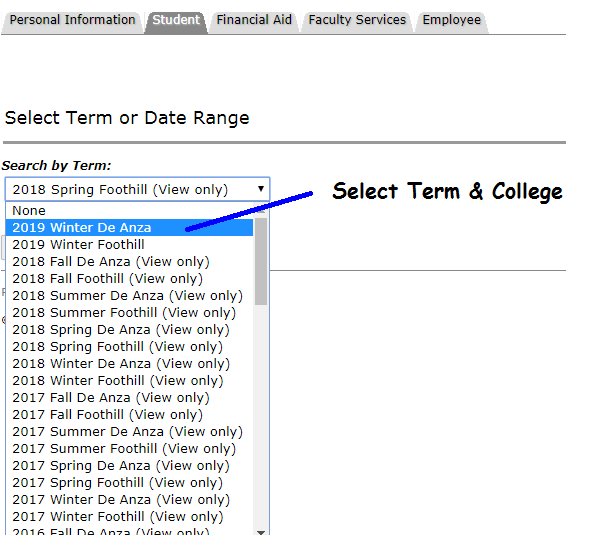
Then click the Submit button.
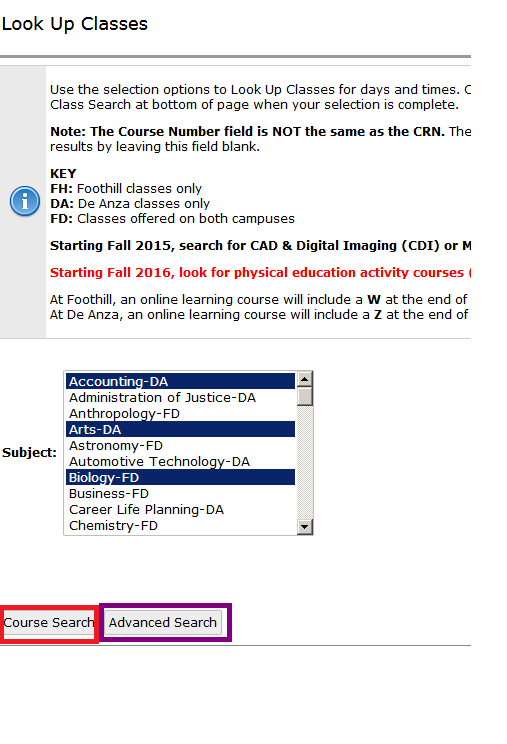
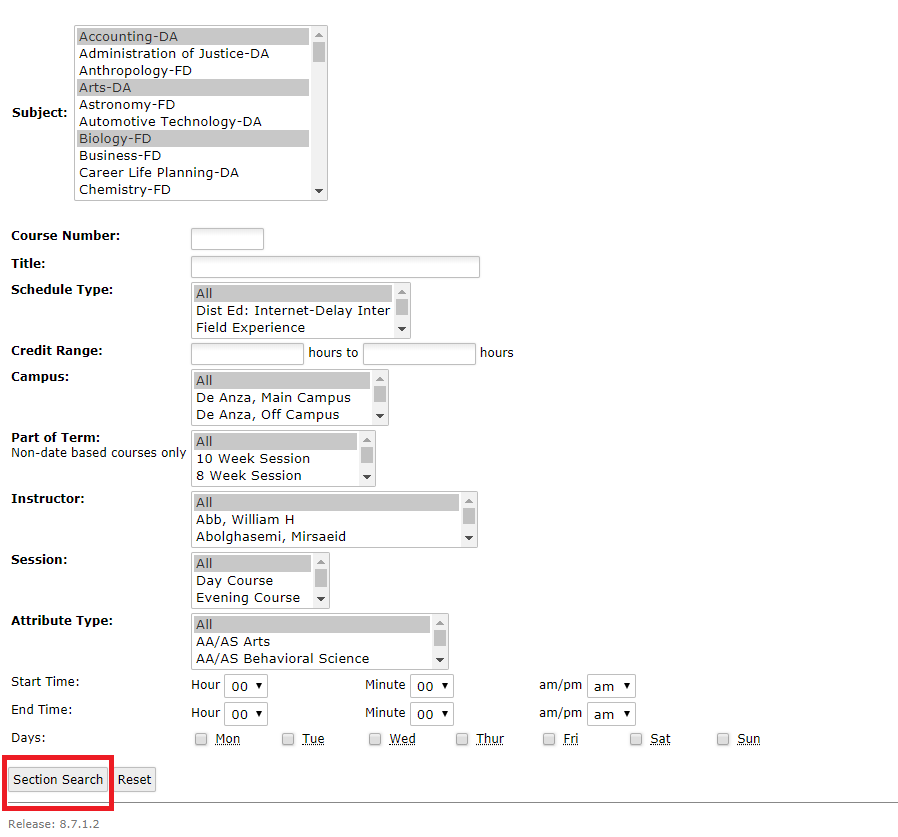
This will open the Look Up Classes page.
Select one or more subjects to do a Course Search. To select more than one subject, hold down the CTRL button (for PCs) or Command button (for Mac) and click on the subjects you'd like to see. (See below for instructions on using the Advanced Search option.)
Your search results will show a list of courses. For each course listed, you can then click the box to View Sections.
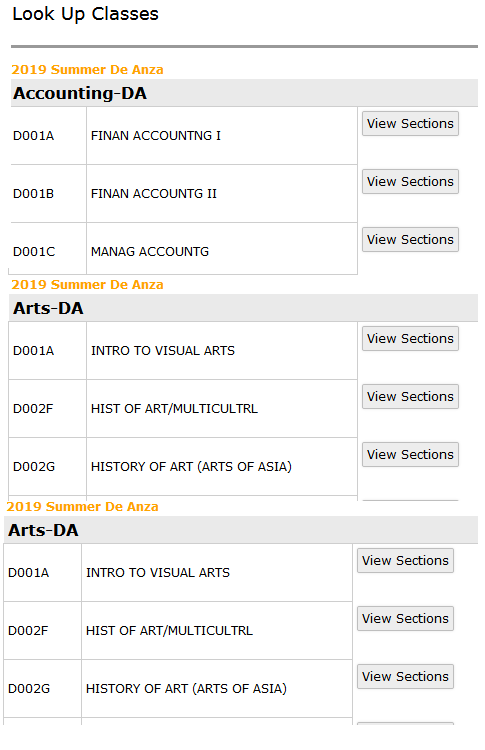
This will show you the available sections for each course.
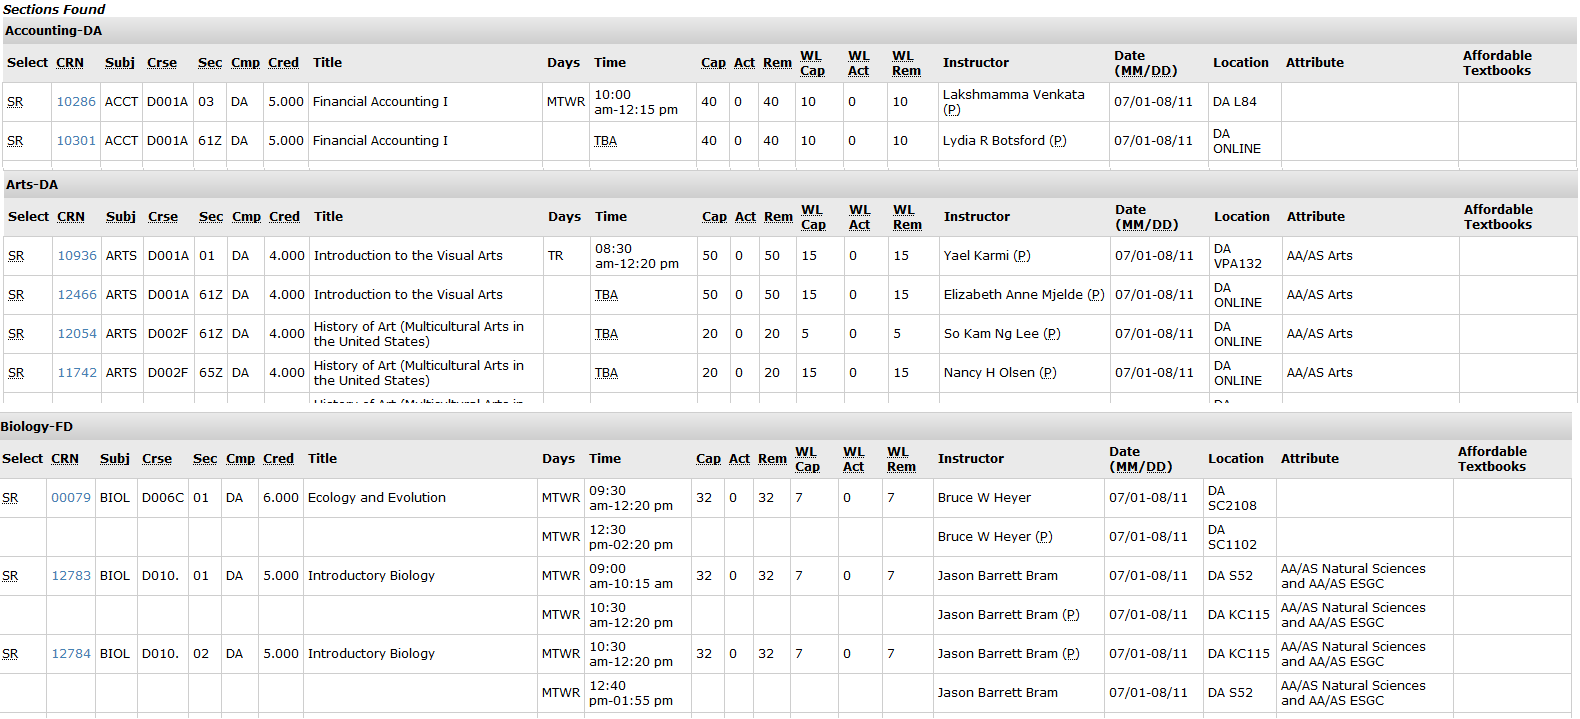
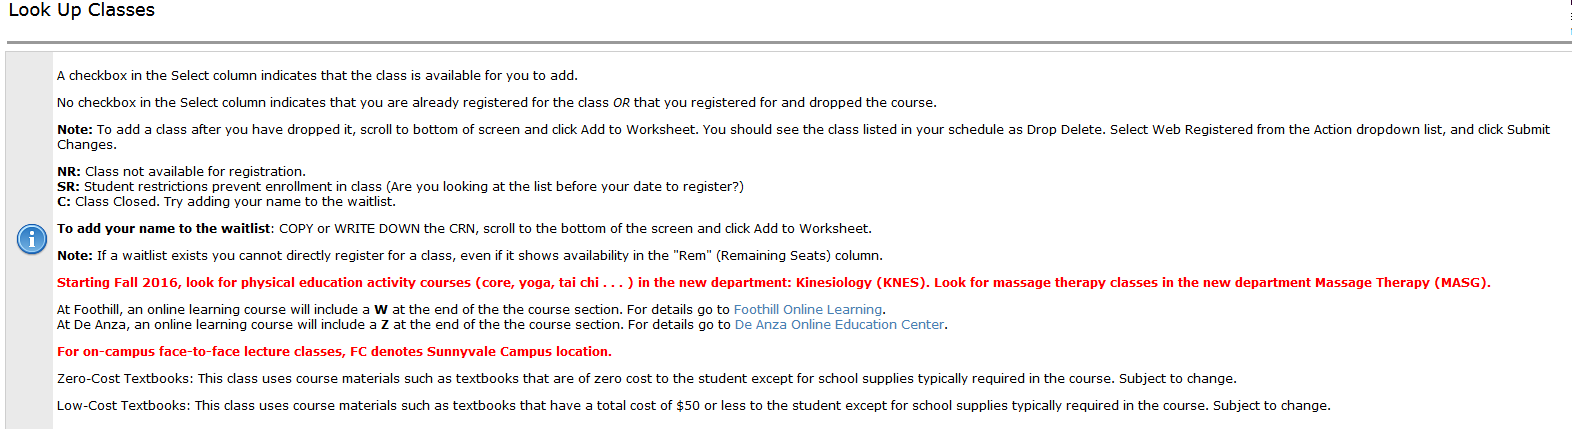
Be sure to look in the Select column at the far left of each section listing. Here is a list of different things that you might see in this column.
- (Check box)
-
This means the class is available for you to add. (* See note below.)
- (No check box)
-
This means you are already registered for the class, or you registered for and dropped the course. See below to learn how to add a class after you dropped it.
- C
-
The class is closed. See below to learn how to add your name to the wait list.
- NR
-
The class is not available for registration.
- SR
-
Student restrictions prevent you from enrolling in the class. For example, you may be looking at the list before your date to register.
You can register for any class that has a checkbox to the left of the class listing AND does not already have a waitlist. (The WL Act column will show 0 if there is not yet a waitlist.)
Here is a list of other column headings that you will see, and what they mean.
- CRN
-
This is Course Reference Number, which is the unique ID number for the class. You'll need this to add your name to the wait list.
- Days
-
M = Monday. T = Tuesday. W = Wednesday. Th = Thursday. F=Friday.
- Cap
-
This is the maximum number of students who can be registered in this class.
- Act
-
This is the actual number of students who have registered so far.
- Rem
-
This is the remaining number of seats available.
- WL Cap
- This is the maximum number of students who can be on the wait list.
- WL Act
- This is the number of students who are currently on the wait list.
- WL Rem
- This is the remaining number of spaces available on the wait list.
- Date (MM/DD)
- This shows the first and last days of class.
- Location
- This is the college and the room number. (DA means De Anza)
* If a class already has students on a wait list, the check box may show "1 Rem" or
"2 Rem" – which means there are 1 or 2 remaining seats. Those seats are reserved for students on the wait list who
have not yet added the class. If you try to register, you will get an error message. But you can add your name to
the wait list, if the wait list still has spaces available.
Steps To Register for a Class
- Click in the check box
- Click the Register button at the bottom of the screen
- You will see a list of your Scheduled Classes
- Click on Pay Now at the bottom of the screen to pay
Important
You must attend the first class meeting for each course in which you enroll. If you don't attend the first class, the instructor has the option of dropping you from the class and giving your seat to a student who's on a waitlist.If you decide to drop a class, you must use the MyPortal system to officially drop the class. Your instructor won't do that for you. You can check MyPortal for the last date on which you can drop, to make sure that you get a refund or a "W" if you are eligible.
Using the Advanced Search Option
You can also use the Advanced Search option, which lets you narrow your search by different variables, such as Course Number, Credits, Instructor or Start Time.
(If you narrow the search too much, it's possible that you may not find classes that meet your specifications. If that happens, try searching with fewer variables.)

Using the Open Classes Finder
While the Searchable Schedule of Classes will show all classes offered in a term, you may also want to use the Open Classes Finder to quickly find classes that still have seats available.
You'll see the Open Classes Finder below the list of Registration Tools, on the Student Registration screen. Use the drop-down list to select the college and term that you want to search.
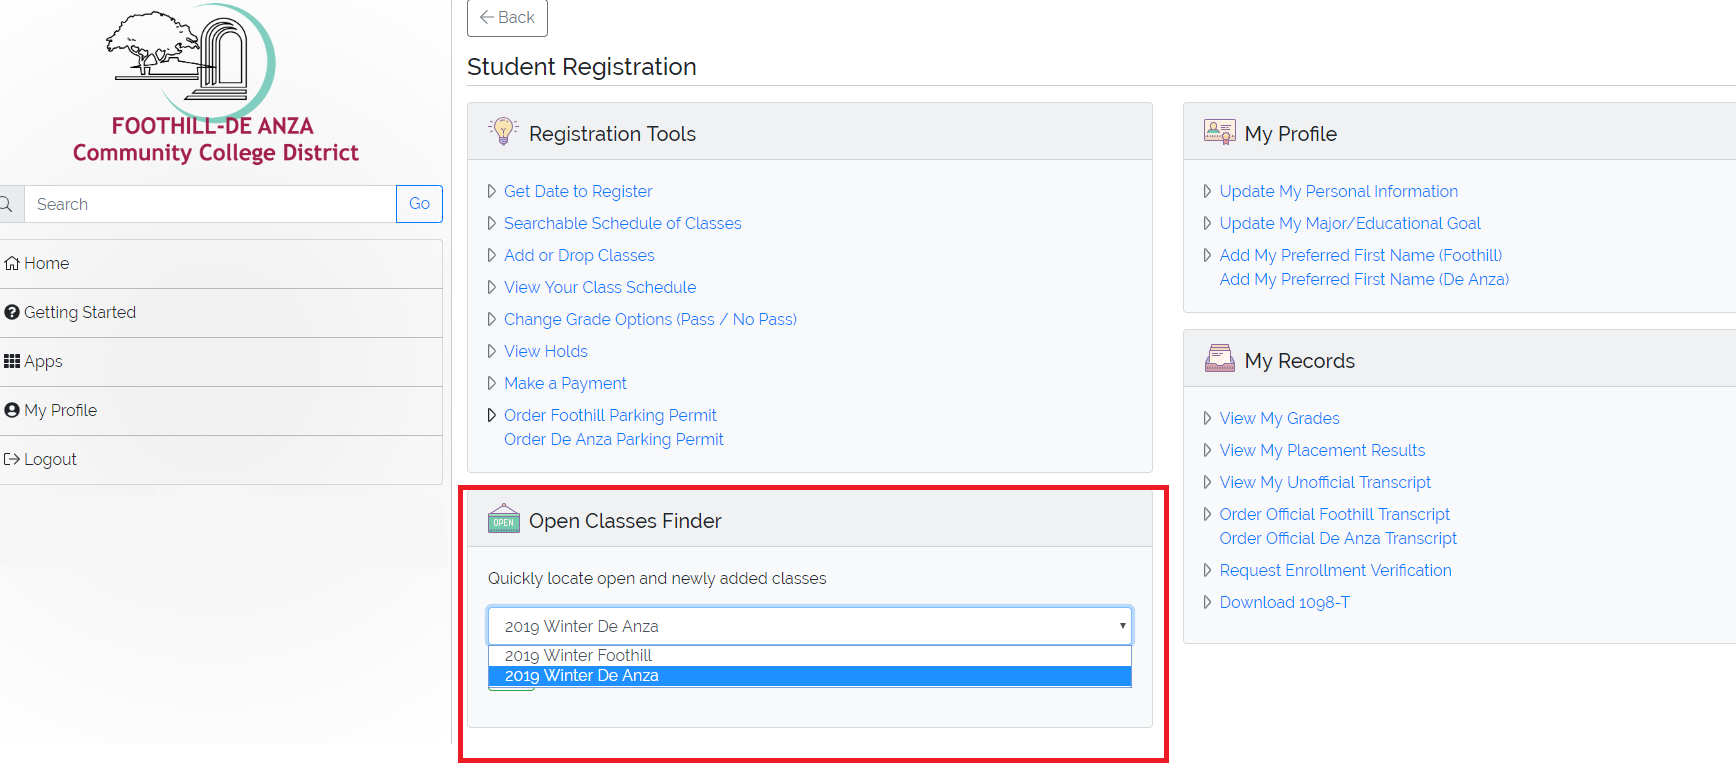
Click the Go Button
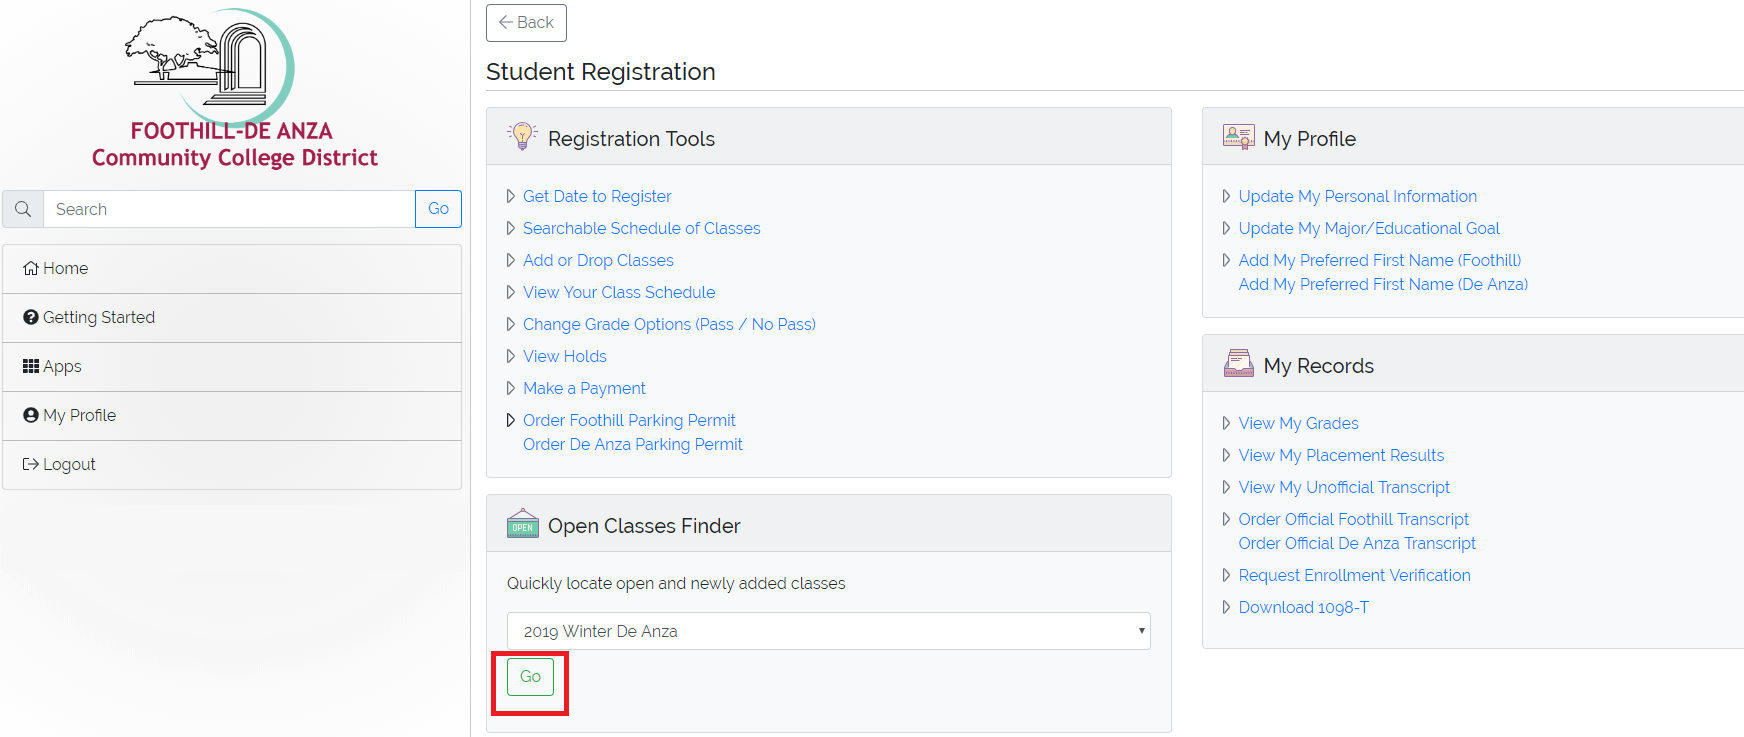
All currently open classes for that college and term will appear.
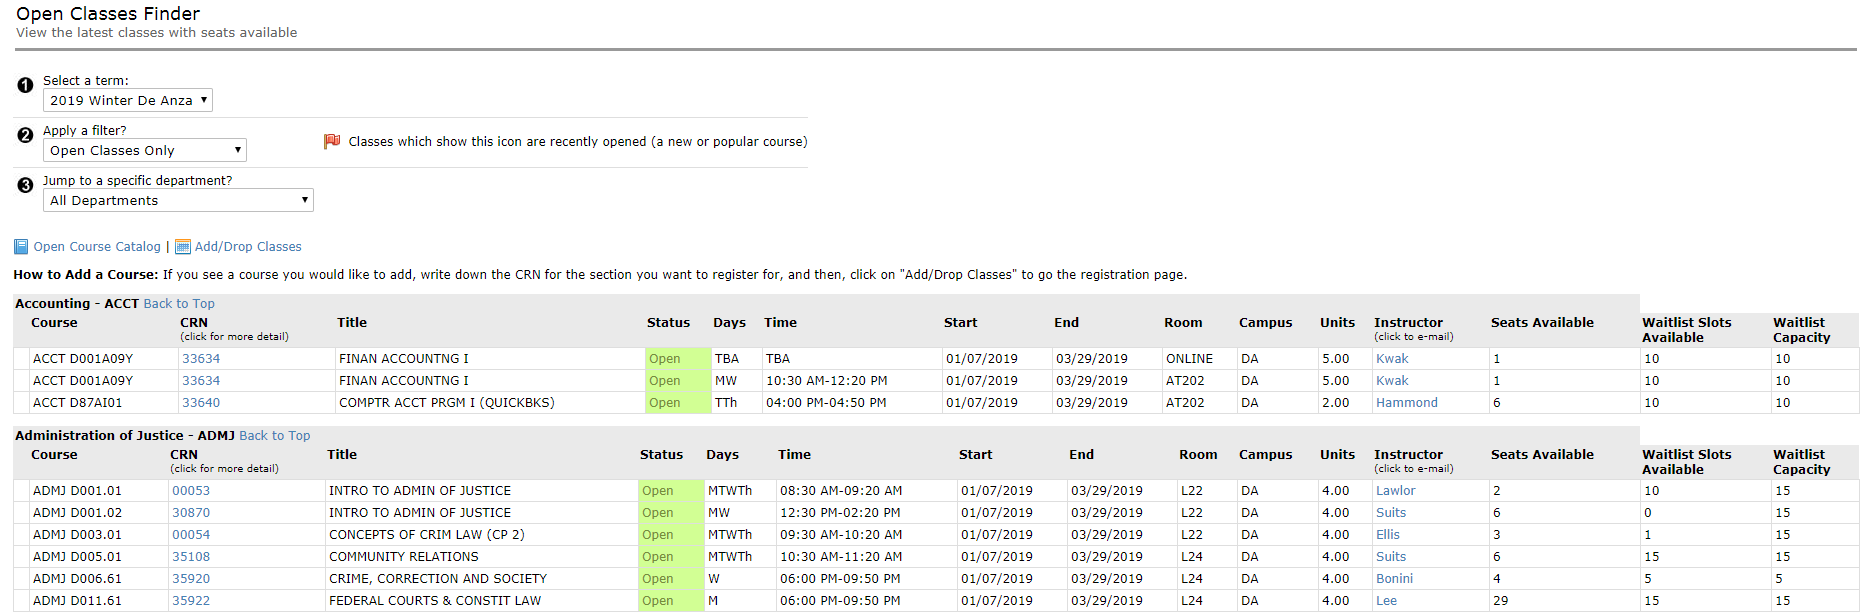
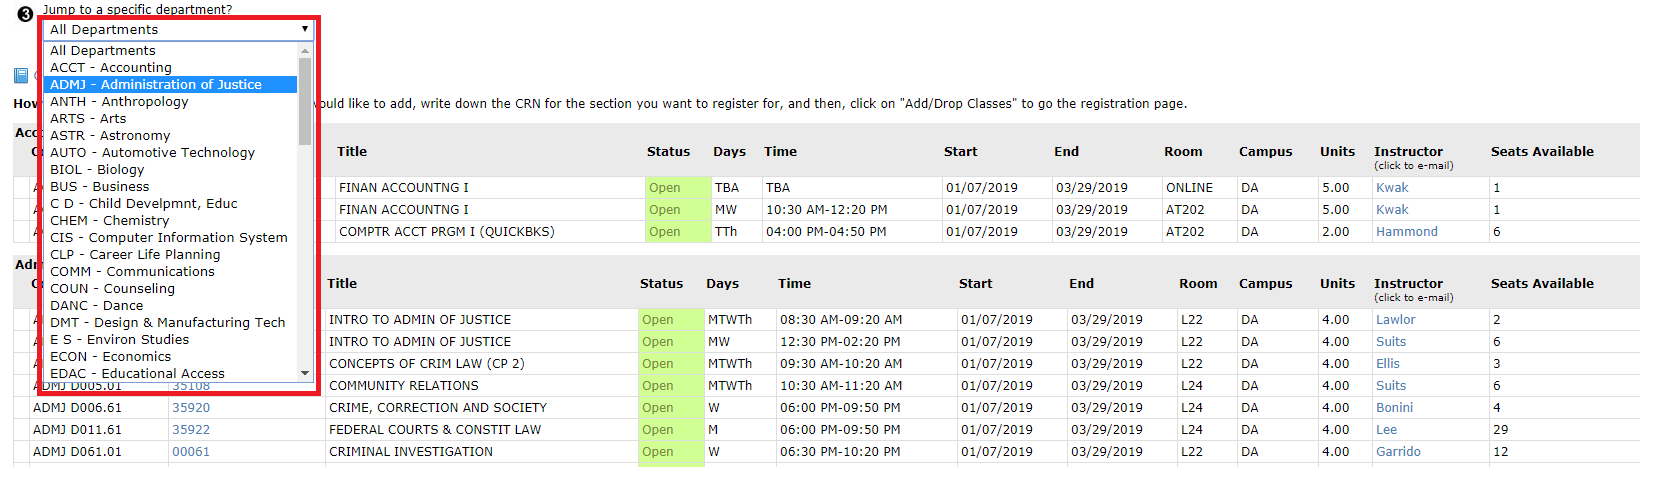
You can select different filters or specific departments to narrow your search. 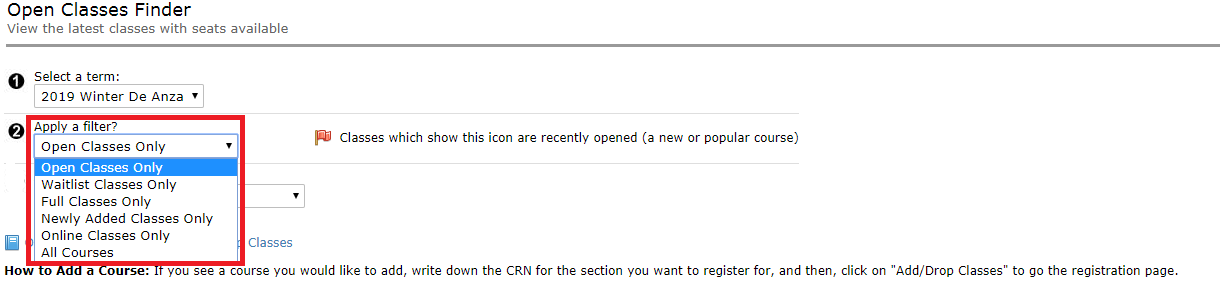
Here's how it looks to search by department.
When you find a class that you would like to add, copy down the course reference number (CRN) and then use the Add or Drop Classes link under Registration Tools. (It's on the main Student Registration page of MyPortal.)
Adding or Dropping Classes
There are three different ways to reach the MyPortal screen that you will use to Add or Drop Classes.
While you are on the main Student Registration page in MyPortal, look under Registration Tools and click on the Add or Drop Classes link.
Or, while you are on the Searchable Schedule of Classes page in MyPortal, you can click on Register or Add to Worksheet
You may see this screen open in a new tab:
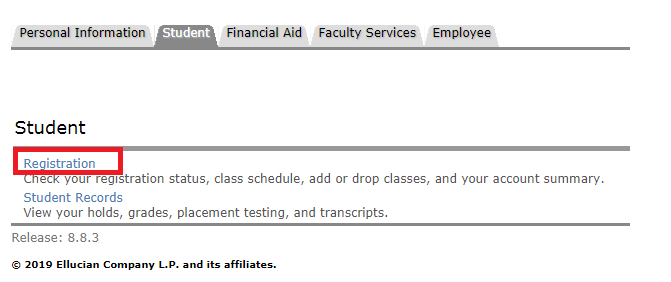
If you see the screen above, click on the Registration link to open this screen. Then click on the Add or Drop Classes link.
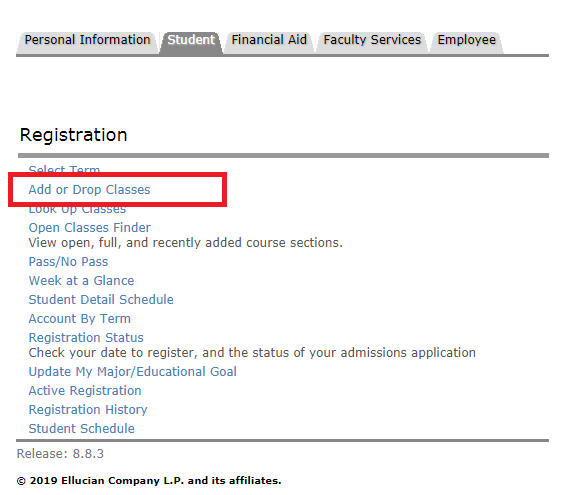
You should then be able to select the college and term from the drop-down menu, and then click the Submit button.

ADDING a Class
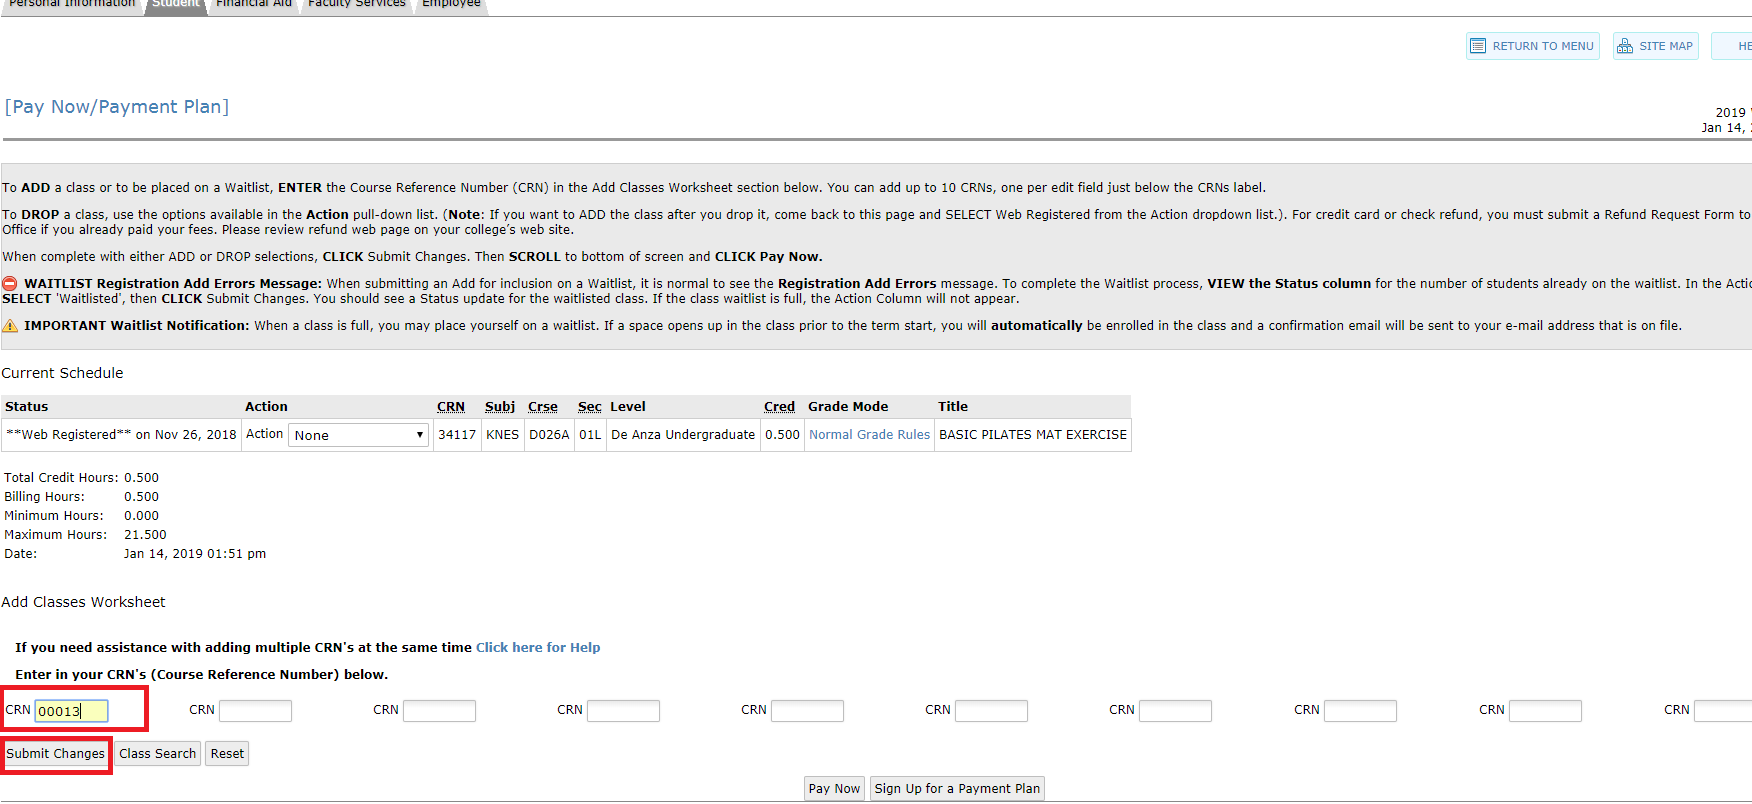
Follow the instructions to register for the class you want to add, using the Add Classes Worksheet.
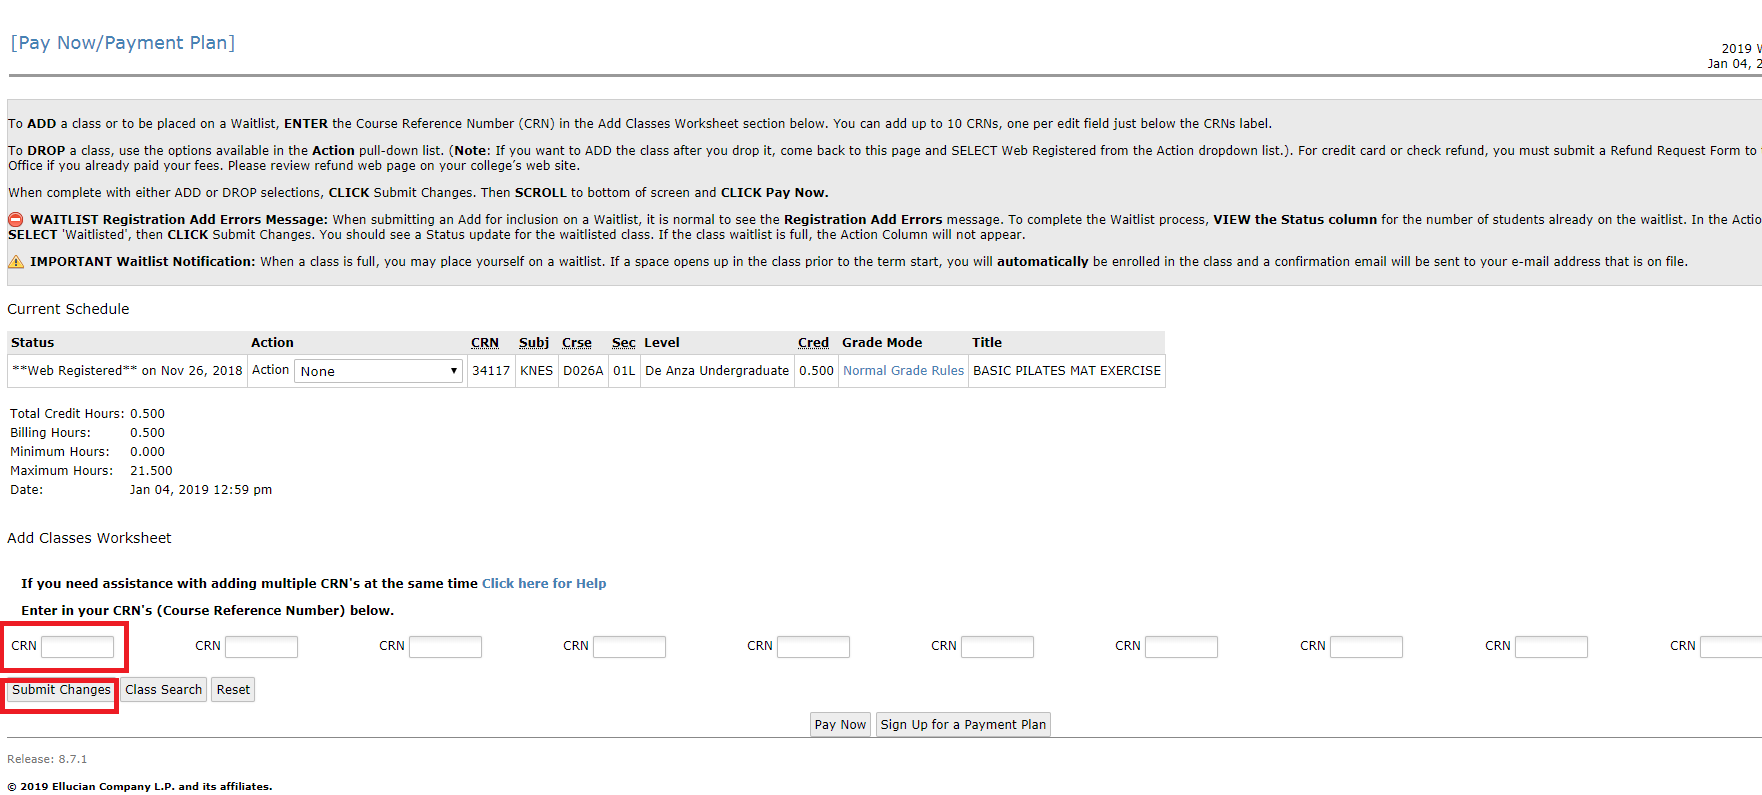
You'll need to enter the Course Reference Number (CRN) in the Add Classes Worksheet.
Next, click on Submit Changes.
Then, click on Pay Now at the bottom of the screen.
Note: If you want to add a class after you dropped it, or after you were dropped for non-payment, you should select Web Registered from the drop-down list. If the class is closed, you won't see Web Registered as an option. However, you can still add your name to the waitlist if there are seats available.
DROPPING a Class
Select one of the options available in the pull-down list.
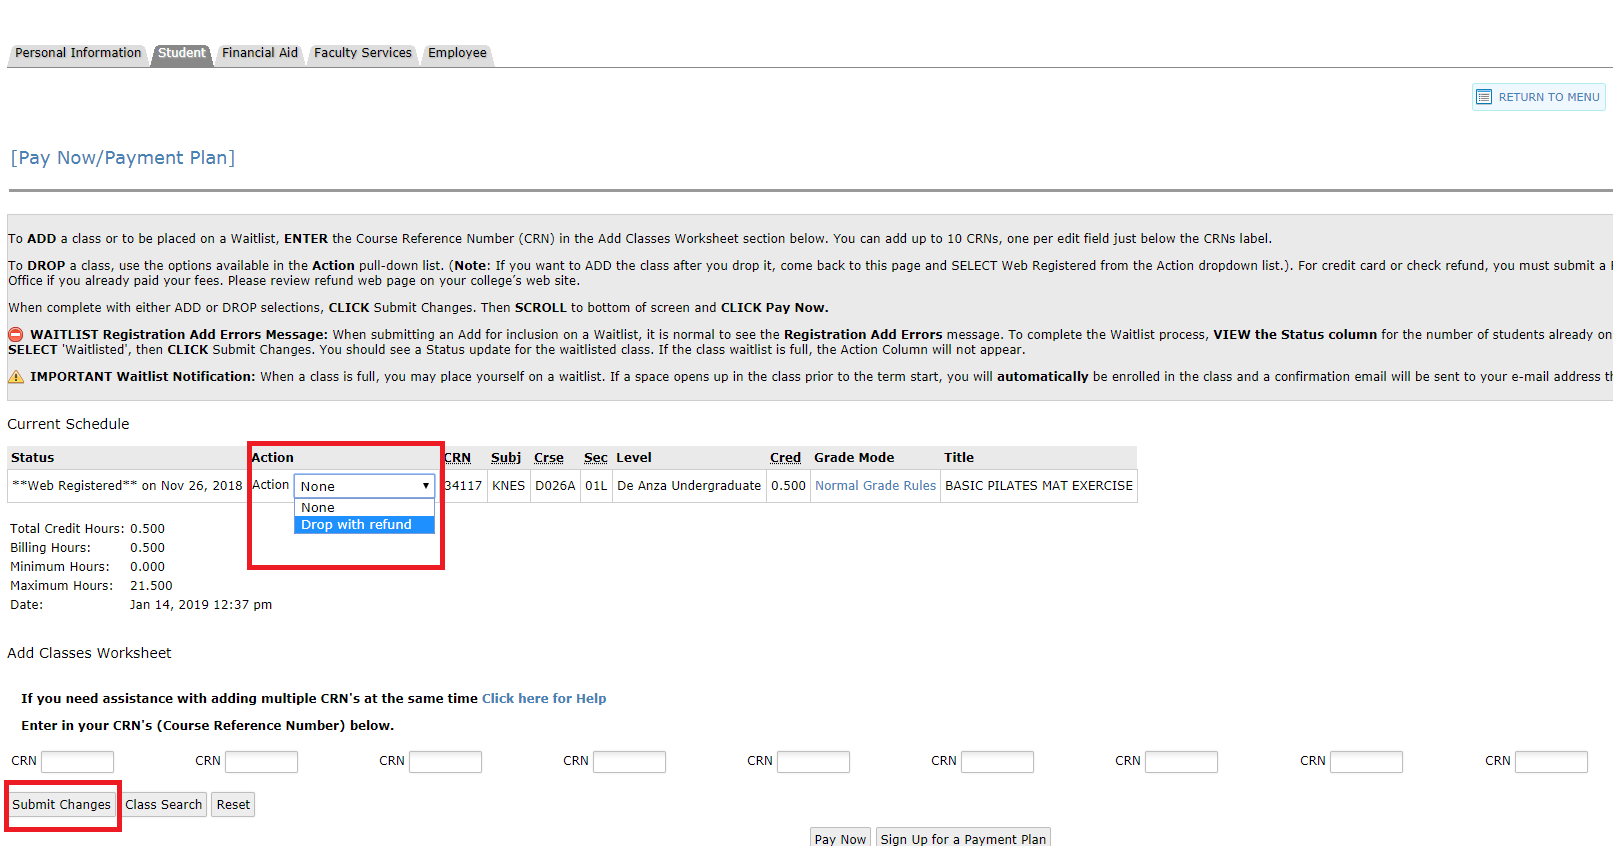
When you are ready, click Submit Changes.
Using the Waitlist
First, you'll need to determine whether seats are available on the waitlist. In the example below, the first class section (ACCT D001A02Y) has 10 waitlist slots available, while the seventh class (ACCT D001A08Y) has nine slots available.
If there is no room on the waitlist, you can keep checking back to see if any students have dropped from the waitlist, which would create a space for someone else. You can also try attending the first meeting of the class, to see if the instructor can issue you an add code.

You won't be able to get on a waitlist if you are already enrolled in another section of the same course, or if the class conflicts in time with any other class you're taking.
To get on the waitlist, write down or copy the class CRN number and click the Add to Worksheet button at the bottom of the page.
When the next screen appears, scroll down to the Add Classes Worksheet at the bottom of the page. Type or paste the CRN number into the box. Be sure to enter all five digits.
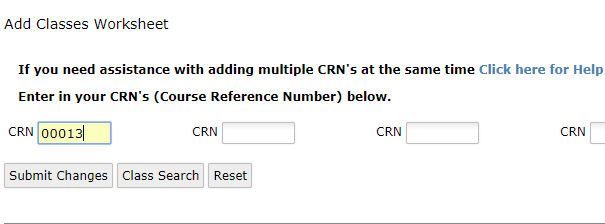
Click the Submit Changes button.
You will see a Registration Add Errors message in the middle of the screen. You can disregard this. Click on the Submit Changes button and you will be directed to enter the Add Code.
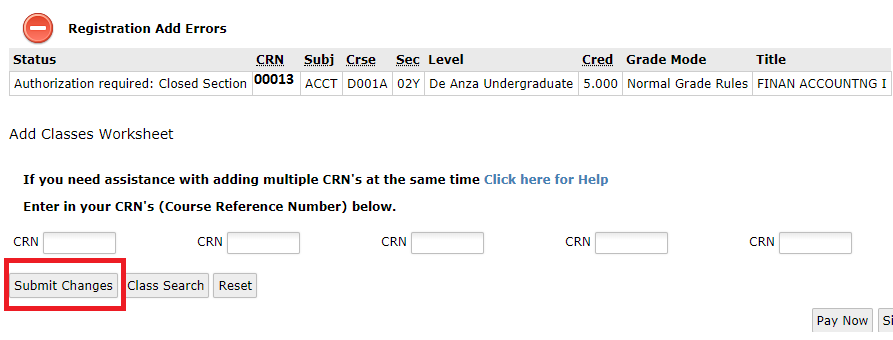
Follow the instructions for Adding a Course with an Add Code.
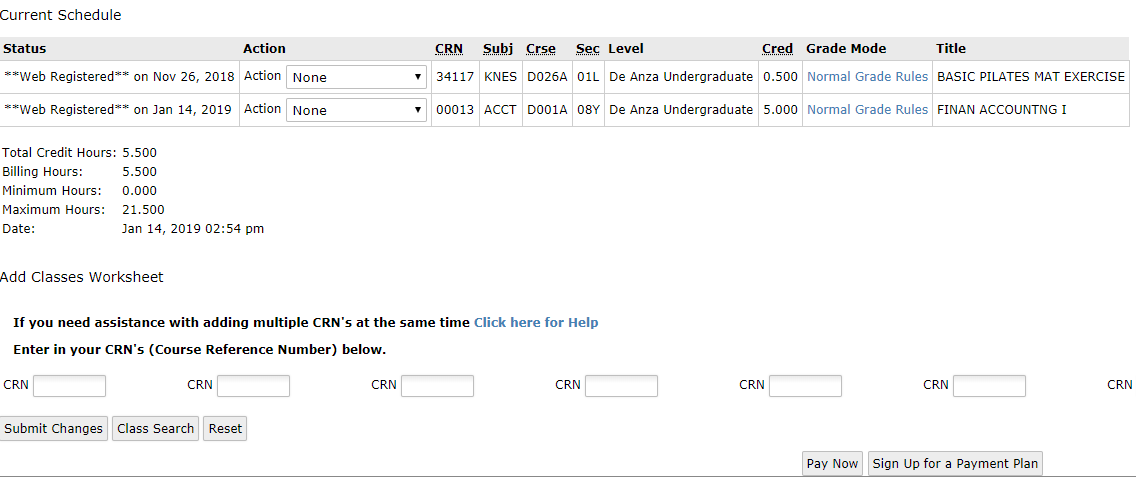
You will then see your updated schedule on the screen.
Remember
Waitlisted students must attend the first meeting of the class. If you are accepted into the class and receive an Add Code after classes begin, you must process the add code before the quarter's add deadline.
Adding a Class with an Add Code
You will need an Add Code to register for a class after the first day that the class meets -- or after the first day of the quarter for online courses. You can get an Add Code by attending the first class meeting and asking the instructor, who will provide the Add Code if there are seats available. (Contact the instructor by email if the class is online.)
- Add Codes will not work before the first day of the class.
- The time frame for adding a standard, 12-week course is usually the first two weeks of the quarter.
- You can check the Class Schedule for the dates of a particular class.
Some courses may require you to complete prerequisite classes before you can enroll. In addition, some classes are only open to students who are already approved for special programs.
Here's how to add the class once you have the Add Code.
Log in to MyPortal and click on the Student Registration card, look under Registration Tools and select Add or Drop Classes.
Select the college and term from the drop-down menu and click the Submit button.
Enter the five-digit Course Reference Number (CRN) in the Add Classes Worksheet section at the bottom of the screen.
Click on Submit Changes.
You will be prompted to enter the Add Code. Follow the instructions on the screen and, after you've entered the Add Code, click on the Validate button.
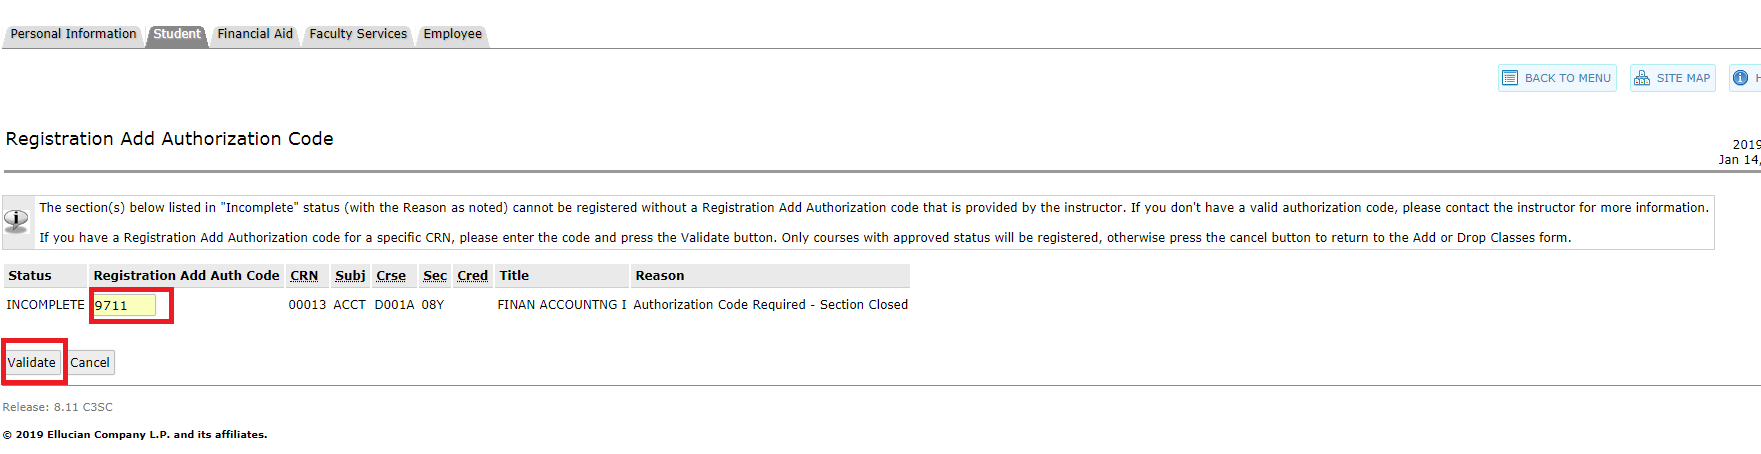
Your fees are due at this point. Click the Pay Now link at the bottom of the screen and follow the prompts to pay your fees.

Changing Grading Options
You can decide to take a class on a Pass/No Pass basis, instead of receiving a letter grade, but you must choose that option by the Friday of the fourth week (for standard, 12-week classes). For classes that are shorter than 12 weeks, you must choose this option by the end of the third week.
To change before the first day of class
Log in to MyPortal and click on the Student Registration card, look under Registration Tools and select Change Grade Options (Pass/No Pass).
To change after the class has started
You will need to fill out a Pass/No Pass request form and submit it to the Admissions and Records Office. You can find the form on the Admissions and Records Student Forms webpage.
There are a few things you should consider before selecting Pass/No Pass as a grading option:
- Once you select this option, the resulting grade will be final.
- Some courses are designed as P/NP courses. A letter grade is not available in these courses.
- If you select the Pass/No Pass option, you still must complete all course work and attendance requirements assigned by the instructor.
- There may be limits on how many units you can take on a Pass/No Pass basis, or how many you can apply toward an associate degree. Check with your counselor.
- A Pass grade may not satisfy major or general education requirements for English or math courses. Check with your counselor.
- Some transfer universities may require letter grades. Check with your counselor or the transfer university.
Auditing a Class
You must submit a Course Audit Request form, which you can find on the Admissions and Records Student Forms webpage.
- Requests to audit a class won't be processed until the second week of the course, or later.
- You will be charged $10 per unit to audit a class.
- Audited courses are not exempt from the rules that limit repeating courses.